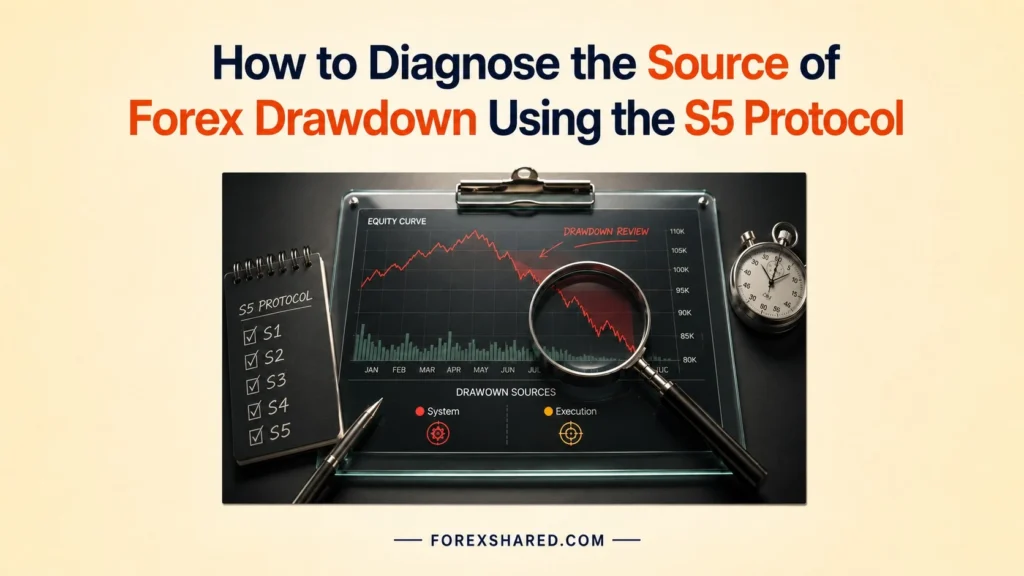
How to Diagnose the Source of Forex Drawdown Using the S5 Protocol
The Drawdown Source Diagnostic S5 Protocol identifies whether account equity erosion is mainly caused by system failure or discipline failure. It strictly separates trades that faithfully followed the written plan from trades that broke the rules. By relying on an objective R-multiple comparison, this diagnostic framework reveals the exact mathematical origin of the ongoing losses.
However, this protocol serves strictly as an educational risk-analysis framework, not a guaranteed profit system or emotional recovery program. The Commodity Futures Trading Commission warns that off-exchange forex trading by retail investors is “at best extremely risky”. Consequently, traders must utilize this tool strictly to diagnose structural failures before considering live execution.
A structured diagnostic protocol replaces guesswork with measurable execution data. By systematically sorting a controlled sample of trades, participants can accurately categorize their drawdown source. The following sections detail the required variables, the trade collection process, the bucket comparison logic, and the testable hypotheses necessary for executing this protocol correctly.
What problem does the Drawdown Source Diagnostic S5 Protocol diagnose?
The Drawdown Source Diagnostic S5 Protocol diagnoses sustained account equity erosion, measured as a peak-to-trough decline in capital, by separating strategy weakness from trader execution weakness [Investopedia, 2024]. It does not judge one trade in isolation; instead, it looks for repeated loss patterns across a controlled sample to isolate the true cause without emotional blame.
Which failure sources must be separated first?
System failure and discipline failure exist as two entirely different causes of drawdown. System failure means the strategy performs poorly even when executed flawlessly. Discipline failure means the strategy itself may work perfectly, but the trader consistently damages the final results through continuous rule-breaking.
What makes drawdown analysis unreliable without separation?
Mixed trade data completely hides the actual source of sustained losses. Emotional execution errors can easily make a highly effective strategy look fundamentally broken. Conversely, normal statistical losses can make a valid system feel psychologically wrong, prompting traders to abandon functional plans prematurely.
Where does the protocol create diagnostic clarity?
The protocol immediately creates diagnostic clarity by labeling each trade as either clean strategy data or polluted execution data. It then compares these two specific groups separately, ensuring that erratic human behavior is never accidentally evaluated as a mathematical system failure.
Which variables identify the true drawdown source?
The Drawdown Source Diagnostic S5 Protocol identifies the true drawdown source by using Plan Adherence as the primary variable and controlling risk, timeframe, strategy version, setup grade, and market state. These precise components filter out random noise and isolate the exact origin of the losses.
| Variable Type | Variable | Diagnostic Role |
|---|---|---|
| Primary Variable | Plan Adherence | Separates valid strategy data from polluted execution data |
| Quality Variable | Setup Grade | Shows whether losses cluster in weak or strong setups |
| Environment Variable | Market State | Reveals whether the system fails in certain conditions |
| Control Variable | Risk Per Trade | Keeps trade outcomes comparable |
| Control Variable | Timeframe | Prevents mixed-style data contamination |
| Control Variable | Strategy Version | Prevents rule changes during the sample |
Which variable acts as the diagnostic gatekeeper?
Plan Adherence consistently acts as the ultimate gatekeeper variable. A trade that strictly follows the plan immediately becomes valid system data. Conversely, any trade that breaks the rules instantly becomes execution-error data, completely disqualified from evaluating the underlying strategy’s actual edge.
What does setup quality add to the diagnosis?
Setup grade clearly shows whether losing trades cluster aggressively inside weak, low-probability setups. By systematically logging this variable, the protocol cleanly separates poor, impulsive trade selection from poor overall strategy design, revealing if the trader simply takes too many suboptimal entries.
Where do control variables protect the test?
Risk, timeframe, and strategy version must stay strictly stable to protect the test’s integrity. Utilizing a consistent position size calculator keeps the risk-per-trade perfectly flat, anchoring the evaluation in a measured risk-management process [CFA Institute, 2026]. If any of these controls change mid-evaluation, the entire sample becomes fundamentally impossible to trust.
How should the trade data be collected for the S5 test?
The Drawdown Source Diagnostic S5 Protocol requires a controlled trade log that records both numeric outcome and execution behavior. Participants must collect a minimum controlled sample before drawing any conclusions, keeping the sample large enough to show a pattern but small enough to review consistently.
| Date | Pair | Setup Grade | Plan Adherence | Result (R) | Qualitative Notes |
|---|---|---|---|---|---|
Which columns prevent emotional rewriting after the trade?
The Plan Adherence column forcefully prevents post-trade story-changing, while the R-multiple column standardizes the outcome mathematically. The notes column securely captures behavioral context while the environment is still fresh, ensuring the trader cannot invent new, defensive explanations weeks later.
What does the result column need to measure?
The result column must measure the outcome in R-multiple rather than only recording raw monetary value. This deliberate standardization allows trades with entirely different lot sizes or currency pairs to be accurately compared directly through their initial planned risk.
Where should qualitative notes stay controlled?
Qualitative notes should strictly describe factual behavior rather than emotional excuses. Good diagnostic notes specifically record overt rule breaks, impulsive stop movement, premature early exits, skipped checklist steps, deep FOMO, or sudden revenge entries executed outside the strategy’s boundaries.
How does R-multiple standardize drawdown analysis?
The Drawdown Source Diagnostic S5 Protocol uses R-multiple to standardize drawdown analysis because each result is measured against initial planned risk, which forms the basis for proper position-sizing logic [Van Tharp Institute, 2020]. This removes the distortion created by varying account sizes, transforming every execution into an identical, mathematically comparable unit of performance.
| R Result | Meaning |
|---|---|
| -1R | Full planned risk lost |
| 0R | Break-even trade |
| +1R | Profit equal to initial planned risk |
| +2R | Profit twice the initial planned risk |
| Below -1R | Loss exceeded planned risk; risk-control warning |
Which risk unit makes trades comparable?
Initial planned risk serves as the foundational base unit for the protocol. It allows vastly different executions, calculated using a standard pip and lot value calculator, to be reviewed uniformly in the exact same diagnostic language regardless of instrument volatility.
What warning appears when losses exceed planned R?
A final result worse than the planned -1R acts as a severe diagnostic warning. This explicitly flags reckless stop movement, intense slippage, dangerous oversizing, or fundamental rule-breaking. These corrupted trades must be reviewed separately before issuing any final system diagnosis [CFTC, 2020].
How should the data be segmented into system and discipline buckets?
The Drawdown Source Diagnostic S5 Protocol segments trade data into system and discipline buckets by using Plan Adherence as the sorting rule. This rigidly separates clean strategy performance from polluted execution-error performance, ensuring the system is never blamed for trader misconduct.
| Bucket | Rule | Meaning |
|---|---|---|
| Bucket A: System Performance | Plan Adherence = Yes | Shows how the strategy performs when followed correctly |
| Bucket B: Discipline Impact | Plan Adherence = No | Shows how rule-breaking affects the account |
| Combined Result | All trades | Shows actual account impact |
Which bucket represents the strategy’s clean signal?
Bucket A strictly represents trades that faithfully followed the written plan. This isolated bucket accurately shows whether the strategy genuinely works under intended rules, providing an untainted mathematical signal completely free from the trader’s emotional interference or spontaneous adjustments.
Which bucket reveals execution damage?
Bucket B strictly represents non-adherent, rule-breaking trades. This specific bucket starkly reveals the heavy financial cost of erratic behavior, untamed emotion, or deliberate protocol deviation, exposing exactly how much capital the trader destroys through poor self-control.
Where does total performance become misleading?
Total combined performance becomes highly misleading because it completely hides the core failure mechanism. A blended equity curve easily masks whether the devastating problem originates from a mathematically flawed strategy or the trader’s consistently poor, chaotic execution habits.
Which diagnosis appears from the bucket comparison?
The Drawdown Source Diagnostic S5 Protocol converts segmented bucket results into a drawdown-source diagnosis by comparing adherent-trade R against non-adherent-trade R. This structured comparison immediately reveals if the bleeding stems from bad rules or a failure to follow good rules.
| Bucket A: Adherent Trades | Bucket B: Non-Adherent Trades | Likely Diagnosis | Meaning |
|---|---|---|---|
| Positive | Negative | Discipline Failure | Strategy may work, but execution is damaging results |
| Negative | Any | System Failure | Strategy loses even when followed |
| Flat / Mixed | Strongly Negative | Execution Drag | System unclear, but behavior is clearly costly |
| Positive | Flat / Positive | No major drawdown source confirmed | Review sample size, market state, and risk control |
When does the data point to discipline failure?
Discipline failure clearly appears when adherent trades perform significantly better than total account results, while non-adherent trades actively drag the combined performance down. This conclusively proves the rules work, but the trader’s behavioral deviations are destroying the edge.
When does the data point to system failure?
System failure clearly appears when the cleanly isolated adherent trades generate deeply negative R-multiples. This proves that the strategy inherently struggles and bleeds capital even under mathematically perfect, completely correct execution, requiring a fundamental structural repair.
Where does the diagnosis stay inconclusive?
The diagnosis must stay strictly inconclusive when evaluating small, mixed, or poorly controlled samples. Under these noisy conditions, the protocol should be diligently repeated under much cleaner controls before the trader commits to any drastic corrective adjustments.
What insight statement should summarize the diagnosis?
The Drawdown Source Diagnostic S5 Protocol should summarize the diagnosis with one direct statement that names the drawdown source, shows R evidence, and points to the next corrective action. This forces absolute clarity before any strategy editing begins.
Required Statement Format
“The data suggests that the primary driver of this drawdown is [System Failure / Discipline Failure / Inconclusive]. Adherent trades produced [X]R, while non-adherent trades produced [Y]R. The next corrective action should focus on [strategy repair / execution control / more controlled data collection].”
Which result should be named first?
The primary diagnosis should always be named first. The reader must immediately know whether the root problem is categorized as system failure, discipline failure, or inconclusive data, establishing the exact framework for the upcoming corrective protocol.
What evidence must support the statement?
The diagnostic statement must prominently feature the precise adherent-trade R alongside the non-adherent-trade R. By displaying this mathematical evidence directly next to the proposed correction direction, the trader validates that the next action is driven purely by hard data.
Which corrective hypothesis should follow a discipline-failure diagnosis?
The Drawdown Source Diagnostic S5 Protocol should follow a discipline-failure diagnosis with a behavioral correction that targets the most expensive rule break first. Instead of completely rewriting the strategy, the trader aggressively locks down the specific execution flaw causing the damage.
| Component | Required Detail |
|---|---|
| Problem | Non-adherent trades are creating negative R |
| Behavioral Cause | FOMO, chasing, revenge entries, early exits, stop movement, or skipped checklist |
| Correction | Pre-trade checklist and stricter entry filter |
| Retest Sample | Next controlled sample of trades |
| Success Signal | Lower non-adherent trade count and improved total R |
Which behavior must be removed first?
The behavioral correction should surgically target the highest-cost rule break isolated in the logs, rather than attempting to fix every bad habit at once. Focusing on the single most destructive error guarantees the highest immediate preservation of account equity.
What makes the hypothesis testable?
A testable hypothesis explicitly names the destructive behavior, defines the exact new control, and clearly states what specific improvement counts as valid evidence. Using an order type decision helper can heavily assist if the error involves impulsive entry execution.
Where does the checklist become useful?
The pre-trade checklist becomes incredibly useful by acting forcefully before entry. It essentially turns internal discipline into a highly visible, mechanical process, preventing the trader from executing a compromised setup during a moment of intense emotional volatility.
Which corrective hypothesis should follow a system-failure diagnosis?
The Drawdown Source Diagnostic S5 Protocol should follow a system-failure diagnosis with a strategy-repair hypothesis based on the losing pattern inside adherent trades. When the rules fail despite perfect execution, the underlying logic must be carefully reconstructed and retested.
| Component | Required Detail |
|---|---|
| Problem | Adherent trades are producing negative R |
| Likely Cause | Weak setup filter, poor market-state fit, bad exit logic, or decayed edge |
| Correction | Rule refinement or market-state filter |
| Retest Method | Backtest, forward test, demo, or paper sample before live risk |
| Success Signal | Improved adherent-trade R without relying on rule-breaking |
Which strategy component should be inspected first?
The specifically inspected component should directly match the exact losing pattern heavily logged inside the adherent bucket. The trader should aggressively scrutinize the setup grade, the prevailing market state, the entry trigger validity, the stop placement logic, or the exit efficiency.
What makes strategy repair safer than random rule changes?
Strategy repair remains vastly safer than random rule changes because the proposed repair must originate from strictly logged evidence. Furthermore, only one major structural change should ever be formulated and tested at a time to isolate its true impact.
Where should the retest happen before live execution?
Retesting the new hypothesis should exclusively happen in rigorous backtest, disciplined forward test, demo, or strict paper-trading conditions. This prevents additional, unnecessary financial damage before the repaired system definitively proves its edge and regains its statistical validity [CFTC, 2023].
What mistakes can corrupt the Drawdown Source diagnosis?
The Drawdown Source Diagnostic S5 Protocol becomes unreliable when the trader changes controls, mixes systems, or rewrites adherence after the outcome. These critical errors instantly pollute the sample, making it mathematically impossible to separate the true signal from the noise.
Changing risk size during the test
Mistake: The trader dynamically changes the risk percentage from trade to trade based on feeling.
Correction: Keep the planned risk exceptionally stable across the entire sample so the standardized R-multiple output remains completely comparable and mathematically sound.
Mixing different strategies in one sample
Mistake: The trader haphazardly logs scalps, long-term swings, volatile news trades, and untested experiments tightly together.
Correction: Run one strictly isolated protocol per strategy version and timeframe to prevent massive structural contamination within the final diagnostic buckets.
Marking bad trades as “plan-adherent” after the result is known
Mistake: The trader dishonestly edits the adherence label to “yes” after seeing a lucky winning outcome.
Correction: Mark Plan Adherence immediately after entry or exit strictly using the written rules, completely ignoring whether the trade made or lost money.
Fixing the strategy before checking discipline
Mistake: The trader frantically changes moving averages and indicators immediately after a painful losing period.
Correction: First definitively confirm whether the severe losses originated from clean system trades or heavily polluted, emotionally driven execution trades before touching the code.
Which protocol controls confirm the S5 diagnosis is usable?
The Drawdown Source Diagnostic S5 Protocol is usable only when the sample is controlled, the strategy rules are stable, and adherence labels are honest. Without these strict boundaries, the resulting bucket comparison provides dangerous illusions rather than factual insights.
| Control | Why It Matters |
|---|---|
| Same strategy version | Prevents rule-change contamination |
| Same timeframe family | Prevents style-mixing |
| Stable risk-per-trade rule | Keeps R-multiple comparable |
| Clear written trade plan | Makes Plan Adherence testable |
| Honest Plan Adherence marking | Protects the main diagnostic variable |
| Consistent R-multiple recording | Standardizes outcomes |
| Market state recorded before interpretation | Prevents hindsight distortion |
| No live-risk escalation | Keeps the test educational and controlled |
Which control proves the sample is not contaminated?
Strategy-version control explicitly proves the fundamental rules stayed stable throughout the evaluation. If core execution rules changed mid-test, the fragmented sample cannot accurately diagnose any one specific system cleanly, completely ruining the mathematical integrity of the entire bucket comparison.
What confirms discipline data is honest?
Honest discipline data is confirmed when Plan Adherence is meticulously marked against hard, written rules, absolutely not based on whether the trade randomly won or lost. This ensures that a lucky, rule-breaking winner remains categorized as a severe execution error.
Which signals distinguish clean diagnosis from emotional review?
Clean diagnosis exclusively uses strictly logged variables, fixed R-multiples, and defined parameters. Conversely, emotional review heavily relies on distorted memory, intense regret, or selectively cherry-picked examples, which naturally leads traders toward destructive, panic-driven adjustments instead of measured optimization.
What should be validated before acting on the S5 diagnosis?
Before acting on the Drawdown Source Diagnostic S5 Protocol, the trader should validate sample quality, controls, R measurement, diagnosis fit, and retest conditions. Skipping this final validation check risks amplifying the drawdown through misaligned or premature strategy adjustments.
| Validation Question | Pass Condition |
|---|---|
| Is the sample size large enough to show a pattern? | Pattern is repeated, not isolated |
| Were all trades from the same strategy version? | One rule set was tested |
| Was risk-per-trade stable? | R results remain comparable |
| Was the timeframe consistent? | Style contamination is reduced |
| Was Plan Adherence marked honestly? | Labels follow written rules |
| Were R-multiples recorded using initial planned risk? | Outcome measurement is stable |
| Did adherent and non-adherent trades show a meaningful difference? | Diagnosis has evidence |
| Does the corrective hypothesis match the diagnosis? | Fix targets the true source |
| Will the next test use controlled conditions first? | Retest avoids emotional escalation |
| Is the article avoiding guaranteed-profit claims? | YMYL safety is preserved |
The Drawdown Source Diagnostic S5 Protocol is useful because it turns drawdown from an emotional account problem into a controlled diagnostic question: is the system failing, or is execution damaging the system? The precise answer must originate from clean trade segmentation, highly stable controls, R-based comparison, and a specific corrective hypothesis rigorously tested under controlled conditions.
Frequently Asked Questions
What is the difference between system failure and discipline failure?
System failure means your strategy loses money even when you follow all the rules perfectly. Discipline failure means the strategy actually works, but you are losing money because you consistently break your own rules (like moving stops, chasing price, or revenge trading).
Why is “Plan Adherence” the most important variable?
Plan Adherence is the only way to separate clean strategy data from polluted execution data. If you don’t know whether a trade faithfully followed your rules, you cannot accurately mathematically judge if your strategy possesses a real edge.
Can I test multiple strategy changes at the same time?
No. You should only test one single variable adjustment at a time (e.g., changing your stop loss size or adding a specific market state filter). Testing multiple changes simultaneously makes it impossible to isolate which adjustment actually fixed the drawdown.